Ever gotten a new dog tag and just stared at it for five minutes, wondering how on earth you’re supposed to get it on your pup’s collar? Yeah, you’re not the only one.
It looks like a simple task until you’re dealing with a squirmy dog, tiny metal rings, and hands that just won’t cooperate. But don’t worry, I’ve been around dogs long enough to walk you through this the easy way.
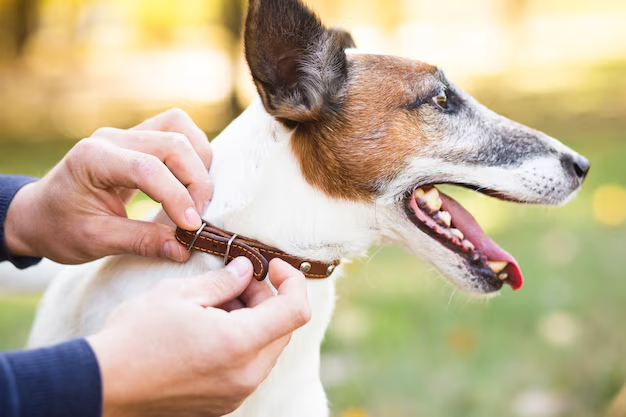
Whether it’s your dog’s first tag or you’re swapping an old one out, getting that little clinking thing on there shouldn’t be a puzzle. Let’s make this whole tag thing way less annoying.
Why The Dog Tag Matters
Before we jump in, let’s talk real quick about why that tag even matters. The truth is, dogs are escape artists. One minute they’re sniffing flowers in the yard, the next they’re halfway down the street chasing a squirrel. A tag with your info could be the one thing that gets them back home safe and sound.
Even if your dog is microchipped, that tag is like their first line of defense. It’s fast, visible, and doesn’t require a scanner. So yeah, that tiny piece of metal? Big deal.
What You’ll Need
Alright, no need to get fancy here. You just need a few simple things:
- The collar your dog wears
- The ID tag (with name and contact info)
- A small key ring or split ring (this usually comes with the tag)
- Optional: a tag clip or S-hook
Oh and maybe a treat or two if your dog’s the impatient kind. Trust me, that’ll come in handy.
Step 1: Check What Kind of Tag Attachment You’ve Got
This is where most people get confused. Not all dog tags are made equal. Some come with a small split ring, like a mini key ring. Others might come with an S-shaped hook. And some fancy ones even come with snap-on clips. Here’s how each one works:
Split ring
This is the most common. It’s basically a tiny version of the thing you keep your house keys on. You’ll twist the ring open a bit and slide the tag and collar onto it.
S-hook
Looks like the letter S, obviously. You slide one end into the tag, the other into the collar’s ring, then pinch both ends closed with pliers.
Tag clip
This one’s the easiest. It’s like a quick-release clip. You just snap it onto the collar and you’re done. If your dog tends to go through tags fast, these save you time and frustration.
Step 2: Get Your Dog to Chill
You don’t want to be fumbling with tiny metal bits while your pup is bouncing around like they just drank an espresso. So get them to settle down first. Some folks do this while the dog’s napping, others give them a bone to keep them busy. Either way, a calm dog makes everything easier.
And if your dog gets weird with their collar off, you can leave it on and just work with it while it’s around their neck. Just be gentle and go slow.
Step 3: Attach The Tag to The Ring
Alright, this is the part that trips people up. Let’s say you’ve got the split ring style, which is the most common. Here’s how you do it:
- Hold the ring like you would a key ring.
- Use your thumbnail to push apart the two metal layers.
- Slide the hole in the tag onto the ring and keep turning it until the tag is fully looped on.
It’s fiddly, yeah. But once you get the hang of it, it goes pretty quick.
If you’ve got an S-hook, you’ll need a pair of pliers. Slide one end into the tag hole, the other into the collar’s D-ring, then pinch them both shut. Make sure they’re really closed so it doesn’t slip off later.
Using a clip? Lucky you. Just hook the tag onto the clip, then snap the clip onto the collar. Boom. Done.
Step 4: Connect The Ring to The Collar
Once the tag is on the ring, the next move is attaching the whole thing to the collar. Most collars have a metal loop or D-ring where you can connect leashes, charms, and yep, dog tags.
Just like you did with the tag, use your fingers to open the split ring and twist it onto the D-ring of the collar. Again, it’s like putting a key on a keychain. If you’ve got thick fingers or long nails, this part might be a little frustrating. But hang in there.
Sometimes, it helps to use a small flathead screwdriver or a butter knife to wedge the ring open. Just don’t stab yourself trying to be clever.
Step 5: Double Check Everything
Once it’s all attached, give it a little tug. Not a yank, but a gentle pull to make sure the tag and ring aren’t going anywhere. You’d be surprised how often tags fall off just because the ring wasn’t closed all the way.
Spin the tag around and see if it’s moving freely. If it’s stuck or too tight, it might make your dog uncomfortable or even rub their fur raw. Loose but secure is the sweet spot.
Optional Step: Use a Tag Silencer
If the jingle-jangle sound drives you or your dog nuts, there are little rubber covers you can get that go around the tag. They’re called silencers. You can also try a silicone tag or even a custom embroidered collar that has your info sewn right in. But that’s another conversation for another day.
What if Your Dog Keeps Losing Tags?
Some dogs are just wild like that. They’ll lose a tag every other week. If your pup is one of them, try using a double ring setup or switch to a tag clip that locks into place. You can also look into slide-on tags that fit flat against the collar. They’re harder to lose and don’t make noise.
A Quick Story
I remember one time I was at the dog park and a pup ran up to us, no tag, no collar. Just a goofball looking for a snack. We had no clue where they came from. Someone eventually recognized them and called the owner, but that could’ve ended way worse.
Point is, those tags matter. And making sure they stay put is worth the few minutes it takes to get them on right.
Things to Avoid When Attaching a Dog Tag
- Don’t use flimsy rings from cheap keychains. They’ll bend or snap.
- Don’t leave the ring half-open. It’ll catch on stuff and fall off.
- Don’t forget to update the info. A tag with an old phone number is just metal at that point.
- Don’t use paper or cardboard tags. Yes, people try this. No, it’s not a good idea.
Tips for Tags That Last Longer
Wanna save yourself the hassle of changing tags every few months? Go for stainless steel or brass ones. They don’t rust or wear down fast. Also, get the info engraved deep, not just printed. The deeper the letters, the longer they’ll stay readable.
Avoid tags with paint or enamel unless you’re okay with it flaking off eventually. Simple and tough wins every time.
Your Dog’s Tag Setup is More Than Just Bling
That little tag might not seem like a big deal, but it’s a piece of safety gear. Kinda like a seatbelt. You don’t think about it until it saves the day. And besides, they can look pretty cute too. A shiny tag with your pup’s name on it? Kinda gives them some personality, don’t you think?
Putting it on might take a few tries, but once you’ve done it, it’s one less thing to worry about. And your dog? They’ll probably just go back to chewing on your sock like nothing happened.
Time to Gear Up
So now you know exactly how to put that dog tag on the collar without losing your mind. Whether it’s your first time or your fifth, it always helps to slow down, get the setup right, and keep your pup safe.
You’ve got this. And hey, once you’re done, maybe go for a little walk and show off that fresh tag. Your dog deserves to strut a little.
Ever tried a different way to put on a dog tag that actually worked better?